This guide will teach you how to install an FTP Server and MySQL Server onto your Windows or Linux machine with minimal hassle and in no time at all! Whether you are looking to transfer, store or host files, or if you need a database for all those records, this guide will be sure to point you in the right direction for getting your file and database needs met!
I recommend FileZilla and Navicat as software clients for accessing an FTP & MySQL server for Windows. The links to download these softwares can be found below in the appropriate section. For Linux, you can use the 'ftp' command.
I will split this guide into different sections to allow for ease of reading, and to assist with the appropriate operating system that applies to your requirements. I recommend FileZilla and Navicat as software clients for accessing an FTP & MySQL server for Windows. The links to download these softwares can be found below in the appropriate section. For Linux, you can use the 'ftp' command.
Please use the links below to jump to the relevant part of the tutorial for your requirements:
Install an FTP Server on Windows
Install a MySQL Server on Windows
SFTP (Linux) [Recommended]
Install an FTP Server on Linux [NOT Recommended]
Install a MySQL Server on Linux
Install an FTP Server on Windows
- I recommend FileZilla FTP Server as a free FTP server for Windows operating systems. You can download FileZilla FTP Server here: https://filezilla-project.org/download.php?show_all=1&type=server
- When installing FileZilla FTP Server, make sure to keep all settings and values as default. This way you are sure to have a clean setup that would be accurate to this guide. When you are asked to 'Enter server to administrate', simply press Connect.
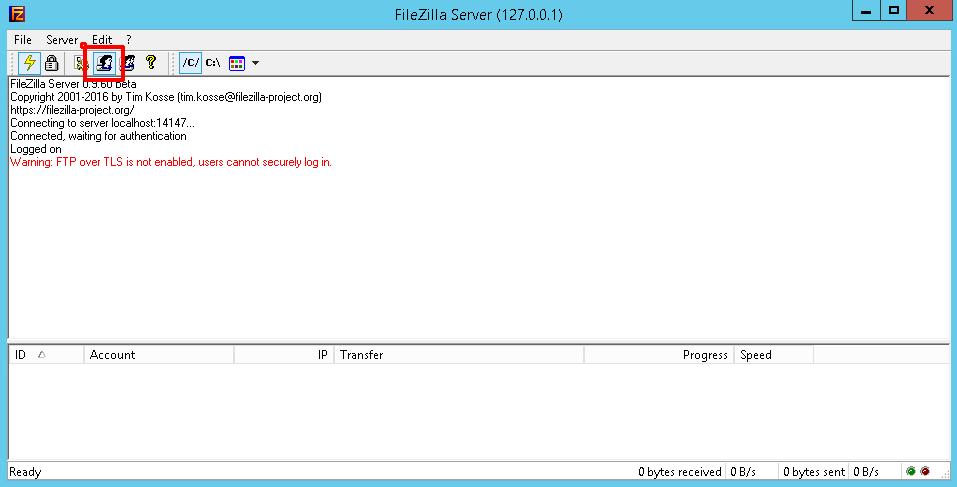
- Once you have installed and opened FileZilla FTP Server, press the icon on the top bar that looks like one head in front of a computer.
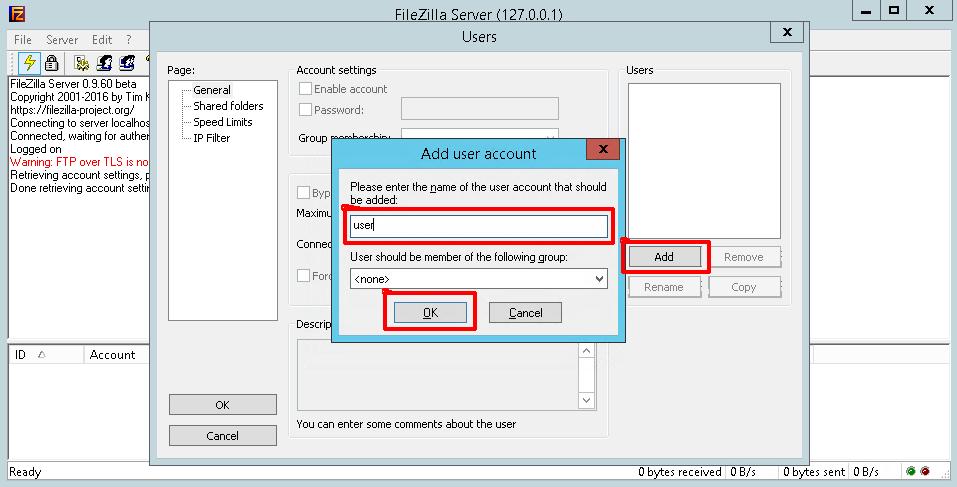
- This will bring up the 'Users' window. On the right-hand side, press 'Add'. Then type a username of your choice into the text field. Then press 'OK'.
- Press the checkbox next to the 'Password' text field, then type the password of your choice into the text field.

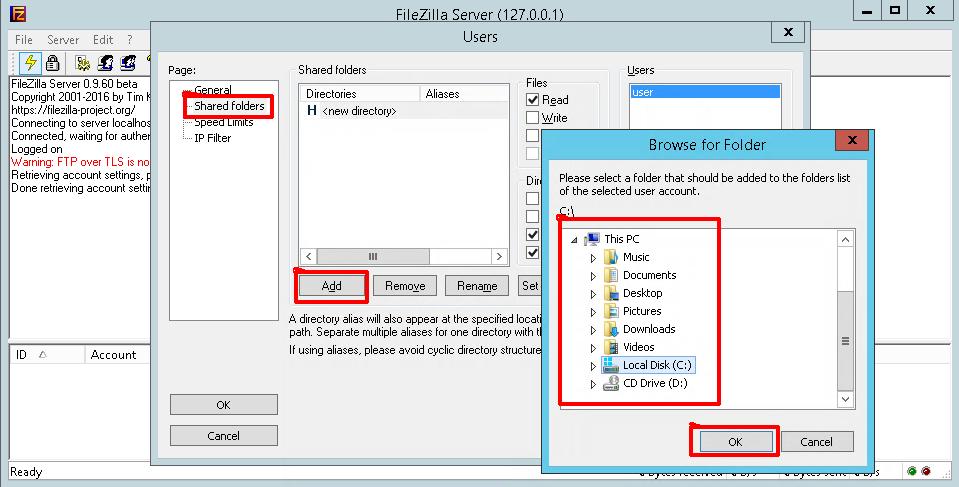
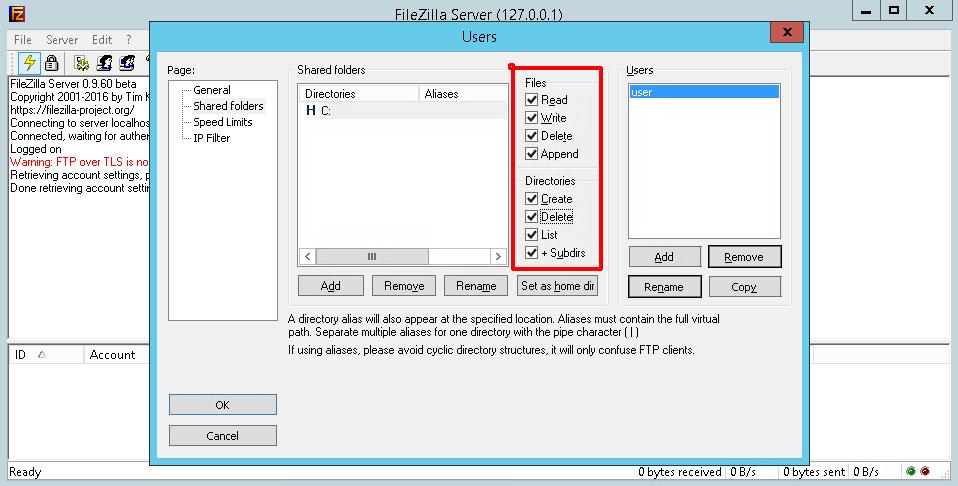
- Next, click on the 'Shared folders' tab on the left-hand side of the 'Users' window. Then press 'Add' in the 'Shared folders' pane. Choose the folder you want to be accessible by the FTP user access. Then press 'OK'.
- Select ALL the checkboxes in the 'Files' and 'Directories' pane. This will give the FTP user all permissions. You may alter these permissions as you see fit but please do it with caution to avoid giving too little permissions for this guide to proceed. Then press 'OK'.
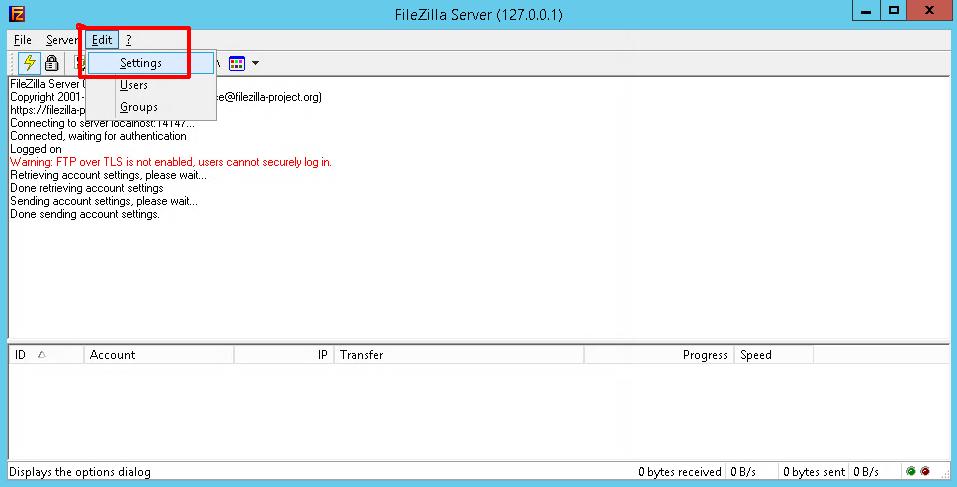
- It is recommended to allow Passive mode for a successful connection. To do this, press the 'Edit' button on the top-bar menu, then press 'Settings'.
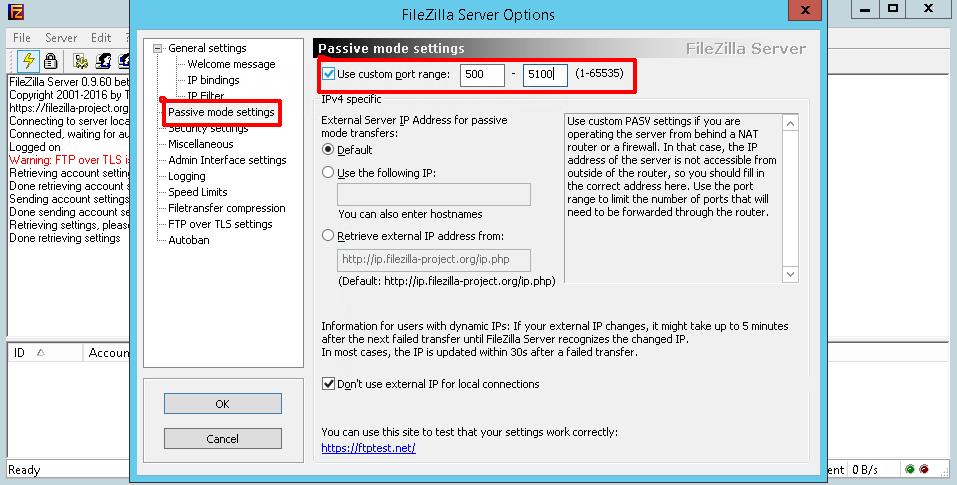
- Press the 'Passive mode settings' bar. Select the checkbox named 'Use custom port range' and type 5000 into the left textbox, and 5100 into the right textbox. Then press 'OK'.
- If you are behind a firewall, you will need to open ports. Please ask your host for help with this, or use this guide if you are only required to open ports through Windows Firewall: How to open ports on Windows Firewall | Server 2012/2016/2019. Open port '21' along with the range 5000-5100.
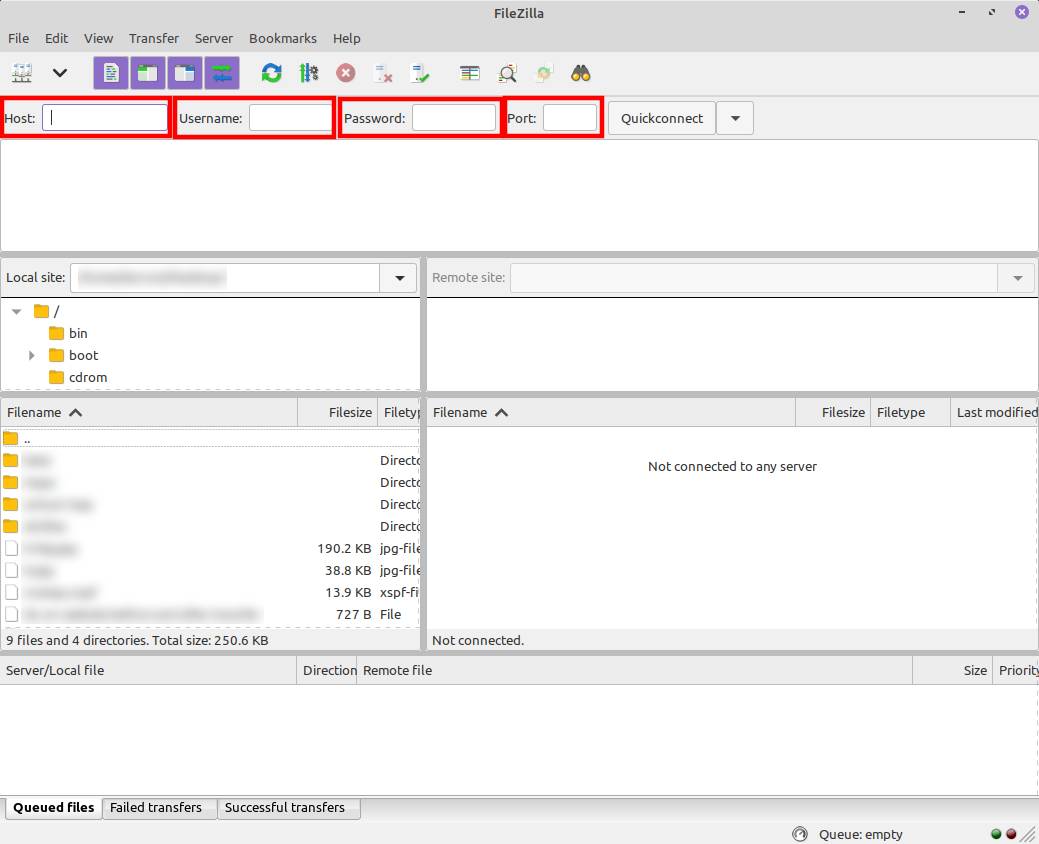
- You have now successfully installed FileZilla FTP Server. I recommend using FileZilla FTP Client to access the FTP Server which you can download here: https://filezilla-project.org/download.php?show_all=1 and use the IP/Host, username, password and port '21' to access the FTP Server from your Client.
Install a MySQL Server on Windows
- Download the latest MySQL Server from here: https://dev.mysql.com/downloads/mysql. I would recommend using the MySQL Installer for ease of installation, and I will be doing so for the remainder of this guide.
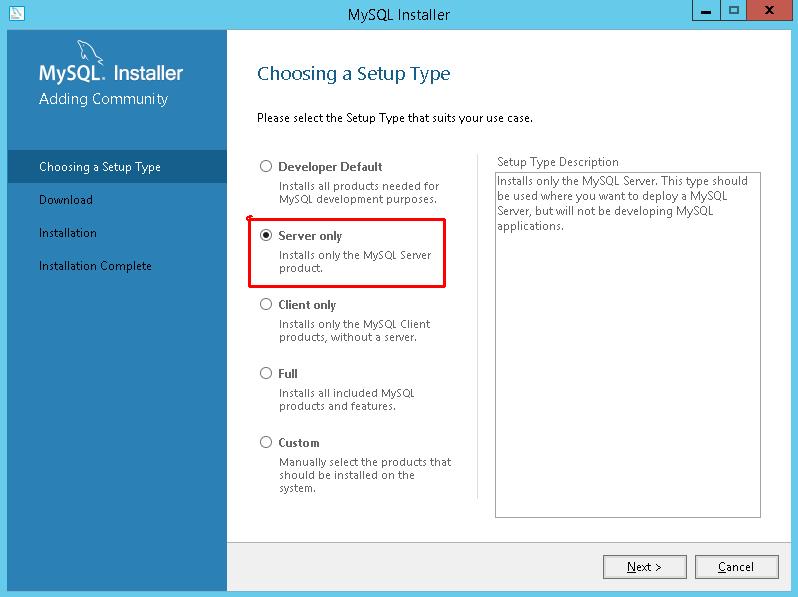
- Once you have downloaded and run the MySQL Installer, select 'Server only'. You can select any other box that is appropriate to your requirements, however for this guide I will only be installing MySQL Server. Then press 'Next'.
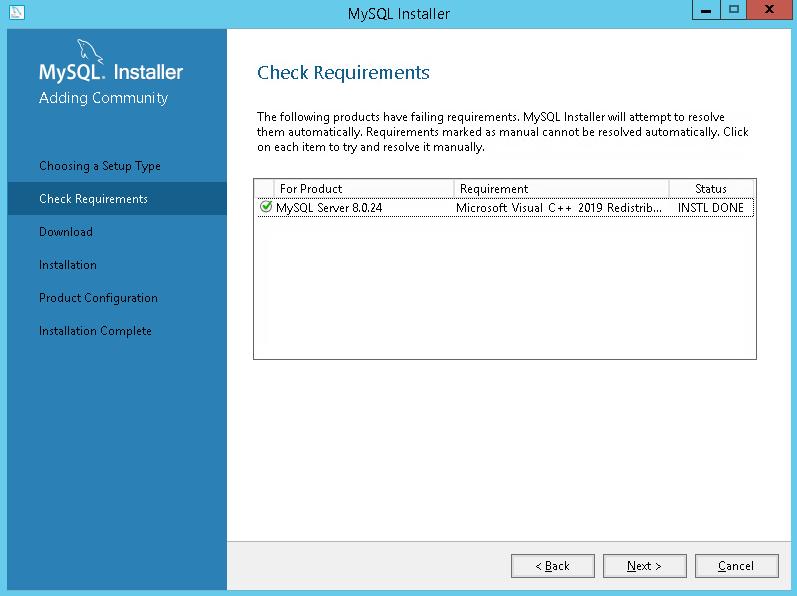
- If you are missing any requirements, they will be listed here. Simply press 'Execute' to start installing the requirements, and once they are complete, press 'Next'.
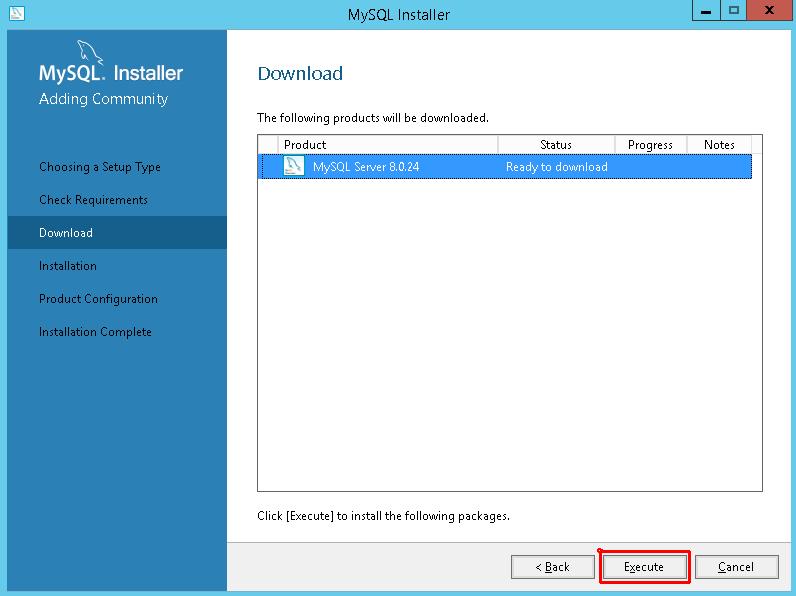
- This page will confirm the products that are going to be downloaded. Simply press 'Execute' to start downloading the products, and once they are downloaded, press 'Next'.
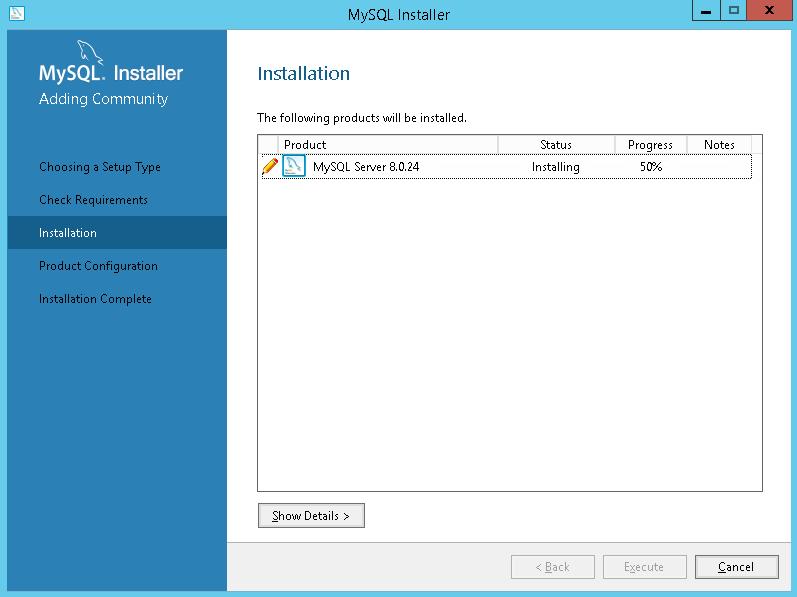
- This page will confirm the products that are ready to install. Simply press 'Execute' to start installing the products, and once they are installed, press 'Next'.
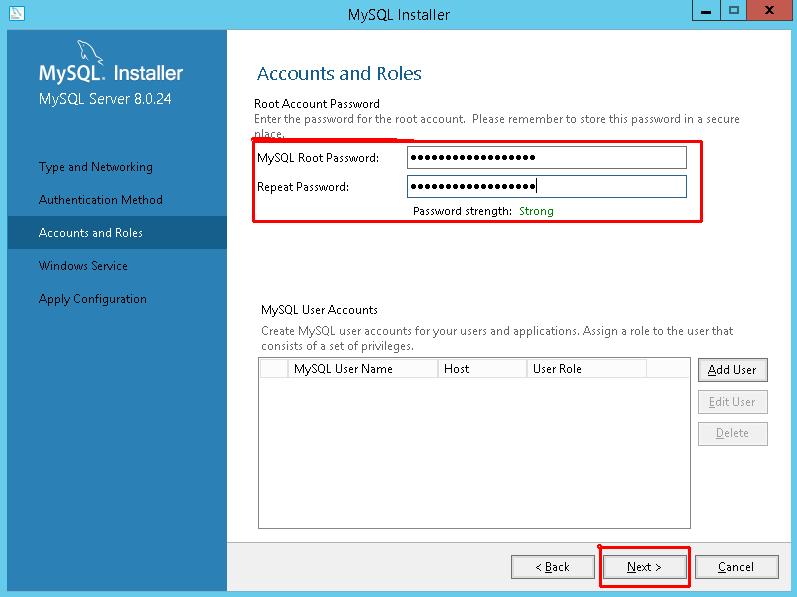
- You will then get a walk through for configuring the installed products, press 'Next'. I would recommend keeping all settings default, so keep pressing 'Next' until you get to an 'Accounts and Roles' page, asking you to enter a 'MySQL Root Password'. You can also add users if you wish. Once you have completed this page, press 'Next'.
- Once again I would recommend leaving all settings as default, so keep pressing 'Next' until you get to an 'Apply Configuration' page. Then press 'Execute'. It will now start applying the configurations for the MySQL products. Once complete, press 'Finish'.

- If you are behind a firewall, and want to allow remote access to the MySQL server, you will need to open ports. Please ask your host for help with this, or use this guide if you are only required to open ports through Windows Firewall: How to open ports on Windows Firewall | Server 2012/2016/2019. Open port '3306'.
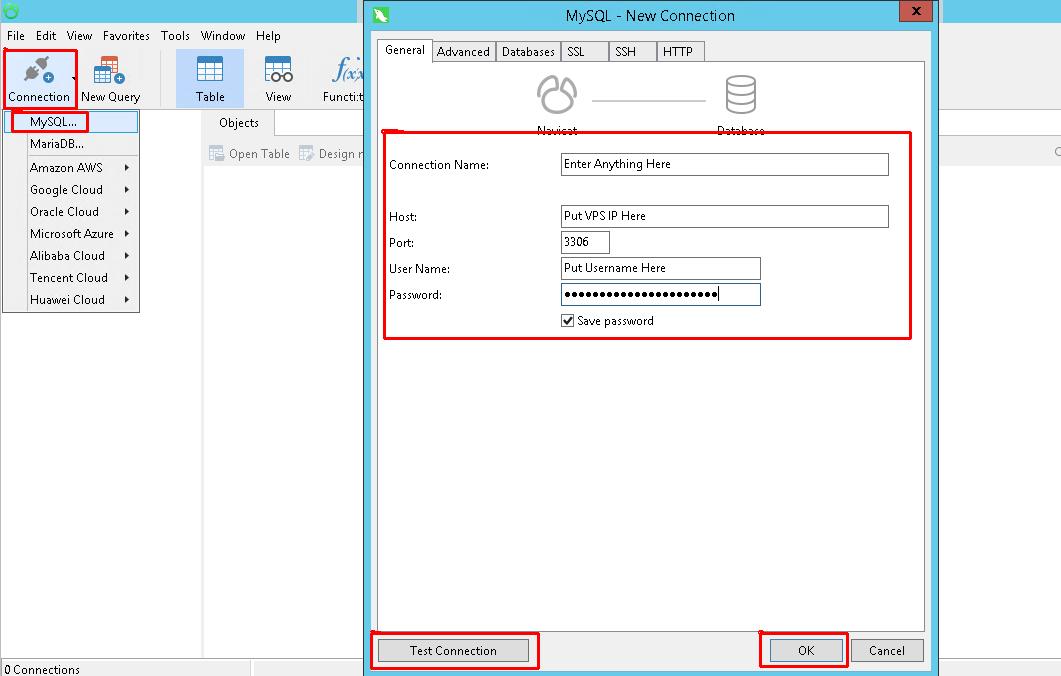
- You have now successfully installed MySQL Server. I recommend using Navicat for MySQL to access the MySQL Server which you can download here: https://www.navicat.com/en/download/navicat-for-mysql and use the IP/Host, username, password and port '3306' to access the MySQL Server from Navicat for MySQL.
SFTP (Linux) [Recommended]
- If you have SSH (Secure Shell) access to your Linux server, you should have something called SFTP which comes with SSH by default. I would strongly recommend using this instead of FTP if possible.
- To access SFTP from Linux, simply type the following command: sftp username@IP replacing the username and IP accordingly.
- To access SFTP from Windows, simply use the same login information as your SSH access into an FTP client, such as FileZilla FTP Client, downloadable here: https://filezilla-project.org/download.php?show_all=1.
Install an FTP Server on Linux [NOT Recommended]
- To install an FTP Server on Linux, I recommend installing 'proftpd' from your distro's appropriate software manager. If you are running Debian/Ubuntu, use this command: sudo apt install proftpd. If you are running CentOS, use this command: sudo yum install proftpd. For this guide, I will use Debian/Ubuntu.
- Allow ProFTPD to run as a service and start every time your machine boots by running the following command: systemctl start proftpd && systemctl enable proftpd
- The location of the configuration file for ProFTPD is: /etc/proftpd/proftpd.conf. You can change the port, default location, allow root access etc from this file. I would strongly recommend using SFTP instead if you want to use FTP for root access.
- To create FTP accounts, they will be shared between Linux user accounts, therefore use the following commands: useradd username and passwd username, replacing username in both instances with the same username of your choice. Then set the user's home directory by typing the following command: usermod -m -d /var/www/ username, replacing username with the same username written above. Then restart ProFTPD by typing the command: service proftpd restart.
- To access the FTP Server, type the command: ftp username@IP changing the username and IP accordingly. Press ENTER and type the password of the account you assigned previously.
- You are now connected to the FTP server from a Linux command-line. You will be required to understand FTP commands at this point, however if you are looking for a more user-friendly client, I would recommend using a Windows client named FileZilla FTP client, downloadable here: https://filezilla-project.org/download.php?show_all=1 and use the IP/Host, username, password and port '21' to access the FTP Server from FileZilla FTP Client.
- If you are behind a firewall, and want to allow remote access to the FTP server, you will need to open ports. Please ask your host for help with this. If you are only behind a software firewall such as iptables, use this command to open port '21': iptables -I INPUT -p tcp --dport 21 -j ACCEPT. Then save the rules permanently if FTP is accessible successfully from a remote location: iptables-save >/etc/sysconfig/iptables.
Install a MySQL Server on Linux
- To install a MySQL Server on Linux, install 'mysql-server' from your distro's appropriate software manager. If you are running Debian/Ubuntu, use this command: sudo apt install mysql-server. If you are running CentOS, use this command: sudo yum install mysql-server. For this guide, I will use Debian/Ubuntu.
- To configure MySQL Server, run the command: sudo mysql_secure_installation. Here you can create the root account.
- To access the MySQL Server, type the command: mysql -u root -p. Press ENTER and type the password of the root account you assigned in the configuration previously.
- You are now connected to the MySQL server and using the 'mysql' command as a client to access and manage the MySQL server. You will be required to understand MySQL commands at this point, however if you are looking for a more user-friendly client, I would recommend using a Windows client named Navicat for MySQL, downloadable here: https://www.navicat.com/en/download/navicat-for-mysql and use the IP/Host, username, password and port '3306' to access the MySQL Server from Navicat for MySQL.
- If you are behind a firewall, and want to allow remote access to the MySQL server, you will need to open ports. Please ask your host for help with this. If you are only behind a software firewall such as iptables, use this command to open port '3306': iptables -I INPUT -p tcp --dport 3306 -j ACCEPT. Then save the rules permanently if MySQL is accessible successfully from a remote location: iptables-save >/etc/sysconfig/iptables.
As always I hope these guides are written clearly and easily enough for everyone to understand, but as everyone has different levels of experience, and each host offers varied features, it is not possible to write a guide that suits every requirement. So if you are stuck or want to be sure to have FTP or MySQL servers installed safely and securely, you can always contact us and we will give you one-to-one management support at an unbeatable quote! We offer management support for installing, configuring and managing any software you need installed - contact us today to get a quote!
If you are looking for Website Hosting, VPS Hosting, Game Server Hosting or Radio Server Hosting - give us a try! Contact us today to receive an unbeatable quote and start a whole new project with us today, or transfer your current one to us!May 1, 2021